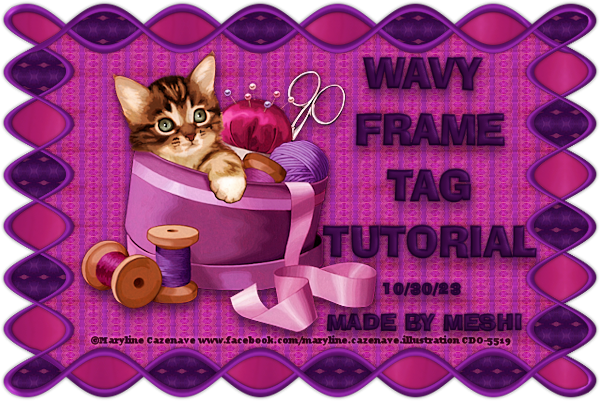
Wavy Frame Tag Tutorial
Wavy Frame Tag Tutorial
Made
by Meshi October 31, 2023
NEEDED
Paint Shop Pro (I used XV).
Free trial here.
No outside filters are needed.
No outside filters are needed.
Just a tube! 😊Preferably
wider than tall.
(I used an
image I purchased
through
A variation idea:
If you would prefer to
use scrap kit papers with
your tube, rather than
make your own patterns,
skip steps 20 - 32, placing
three scrap papers for the
bottom layers.
Crop to canvas size
afterward.
(See step 4 for how to
crop quickly.)
If you would prefer to
use scrap kit papers with
your tube, rather than
make your own patterns,
skip steps 20 - 32, placing
three scrap papers for the
bottom layers.
Crop to canvas size
afterward.
(See step 4 for how to
crop quickly.)
Let's Begin!
1. File > Open
Your tube
2. Window > Duplicate
(Close the original.)
3. Edit > Copy (for later
Your tube
2. Window > Duplicate
(Close the original.)
3. Edit > Copy (for later
Apply
5. Image > Resize
Suggested Dimensions:
Height no taller than 320
Suggested Dimensions:
Height no taller than 320
Pixels
Width no wider than 490.
Width no wider than 490.
Resample using: Bicubic
Lock aspect ratio = Checked
Resize all layers = Checked
* We can resize more later
Lock aspect ratio = Checked
Resize all layers = Checked
* We can resize more later
if you would like.
6. Dropper Tool
Left click on your tube and
choose a medium/dark
color for your frame.
Right click on your tube
Right click on your tube
and choose a color for the
background behind your
tube.
FRAME
7. Image > Canvas Size
New Dimensions
Width: 663 Pixels
Height: 440
Placement = Middle box
*We will change the end
result size later.
FRAME
7. Image > Canvas Size
New Dimensions
Width: 663 Pixels
Height: 440
Placement = Middle box
*We will change the end
result size later.
8. Layers > New Raster
Layer
9. Selections > Select All
10. Selections > Modify >
Contract
Settings:
Number of pixels = 10
11. Selections > Invert
12. Flood Fill Tool
Settings:
Match mode = None
Use all layers = Unchecked
Blend mode = Normal
Opacity = 100
Flood fill with your
foreground color.
13. Effects > 3D Effects >
Inner Bevel
Settings:
Bevel = 2
Width = 10
Smoothness = 50
Depth = 8
Ambience = 15
Shininess = 25
Color = White
Angle = 315
Intensity = 30
Elevation = 60
14. Selections > Select
None
15. Image > Resize
Settings:
Width and Height = 85
percent
Resize all layers = Not
15. Image > Resize
Settings:
Width and Height = 85
percent
Resize all layers = Not
checked
16. Effects > Distortion
Effects > Wave
Settings:
Horizontal and Vertical
displacement both:
Amplitude = 5
Wavelength = 25
Edge mode = Transparent
17. Layers > Duplicate
18. Image > Flip Vertical
19. Layers > Merge >
Merge Down
Note: If you are using
scrap papers place them
at the bottom and crop.
Skip instructions 20
through 33. Rejoin at 34.
20. Layers > New Raster
Layer
21. Layers > Arrange >
Send to Bottom
22. Flood Fill Tool
Flood fill with background
color.
23. Selections > Select All
24. Edit > Paste Into
Selection
(If this does not work,
highlight and copy your
tube layer; then try again
pasting into the still
selected bottom layer.)
25. Selections > Select
None
26. Effects > Image Effects
> Seamless Tiling
Settings:
Default
27. Layers > Duplicate
28. Edit > Repeat Duplicate
Layer
29. Effects > Reflection
Effects > Pattern: Play with
26. Effects > Image Effects
> Seamless Tiling
Settings:
Default
27. Layers > Duplicate
28. Edit > Repeat Duplicate
Layer
29. Effects > Reflection
Effects > Pattern: Play with
the dice (Randomize
Parameters) until you get
something you think
Parameters) until you get
something you think
would look great as part of
your frame.
30. Layers > Arrange >
Send to Bottom
31. In Layers Palette
Highlight your top
duplicate copy.
32. Repeat steps 29 - 31
33. Repeat steps 29 - 31
this time choosing a
pattern that would look
great for the background
behind the tube and frame.
30. Layers > Arrange >
Send to Bottom
31. In Layers Palette
Highlight your top
duplicate copy.
32. Repeat steps 29 - 31
33. Repeat steps 29 - 31
this time choosing a
pattern that would look
great for the background
behind the tube and frame.
Let your creative juices be
released here by creating
a
background of your choice.
You may decide on a plain
background with noise or
texture, a gradient, or a
scrap kit paper
instead.
34. Layers Palette
Highlight your top, frame
layer.
35. Magic Wand Tool
Settings:
Mode = Add (Shift)
Match mode = RGB Value
Tolerance = 0
Use all layers = Not
checked
Contiguous = Checked
Feather = 0
Anti-alias = Checked
Inside = Chosen
Select every other open
hole in your frame. There
are fourteen.
36. Selections > Modify >
Expand
Number of pixels = 2
37. Selections > Invert
38. Layers Palette
Highlight your top pattern
layer.
39. Edit > Clear
40. Selections > Select
None
41. Layers Palette
Highlight your Frame layer.
42. Magic Wand Tool
Select every other open
hole in your frame (the
ones you haven't already
chosen).
Again, there are fourteen.
43. Selections > Modify >
Expand
Number of pixels = 2
44. Selections > Invert
45. Layers Palette
Highlight your next
pattern layer.
46. Edit > Clear
47. Selections > Select
None
48. Layers Palette
Highlight your frame layer.
49. Magic Wand Tool
Select the transparent
section outside your wavy
frame.
50. Selections > Modify >
Expand by 2.
51. Layers Palette
Highlight your frame layer.
49. Magic Wand Tool
Select the transparent
section outside your wavy
frame.
50. Selections > Modify >
Expand by 2.
51. Layers Palette
Highlight your bottom
layer chosen for your
background paper.
52. Edit > Clear
53. Selections > Select
None
54. Layers > Palette
Highlight your frame
55. Effects > 3D Effects >
Drop Shadow
Add a small shadow to
your frame. I used:
Vertical & Horizontal = 0
Opacity = 50
Blur = 5
Color = Black
56. Layers Palette
Highlight your tube
57. Effects > 3D Effects >
Drop Shadow of your
choosing.
58. Crop Tool
Merged Opaque
Apply
59. Image > Resize
Resize all layers = Checked
Width = 600
60. Adjust Sharpness >
Unsharp Mask
Low Res Portrait or of your
60. Adjust Sharpness >
Unsharp Mask
Low Res Portrait or of your
choosing
61. Move Tool
Move tube where you like
best.
61. Move Tool
Move tube where you like
best.
Optional step:
62. Image > Resize
Percentage can be 95%
and if need be, repeat,
until you like it best.
Resize all layers =
Unchecked
63. Add copyright/credits.
64. Text Tool
Add words/name however
you'd like.
65. File > Export PNG
Optimizer at default
----------------------------
You are done!
I hope you enjoyed it. :)
I hope you enjoyed it. :)
*A huge thank you to my
tester, Barbara, who
helped make this the best
it could be!


Comments
Post a Comment