Needed:
Paint Shop Pro (I used XV).
No outside filters are needed.
A tube - Wider than tall. (I used an image I purchased through Creative Fabrica).
faux rag paper supplies Unzip and place selection in your selections folder and texture in your texture folder.
No outside filters are needed.
A tube - Wider than tall. (I used an image I purchased through Creative Fabrica).
faux rag paper supplies Unzip and place selection in your selections folder and texture in your texture folder.
Klarinda Playful is the
font I used.
Let's
Begin!
1. File > Open
Your tube
2. Window > Duplicate
(You can now close out the original.)
(You can now close out the original.)
3. Image > Resize
Pixel Dimensions
Height 246 Pixels
(234 if you don't have space above and below)
Resample using: Weighted Average
Lock aspect ratio = Checked
Resize all layers = Checked
Pixel Dimensions
Height 246 Pixels
(234 if you don't have space above and below)
Resample using: Weighted Average
Lock aspect ratio = Checked
Resize all layers = Checked
4. Adjust > Sharpness > Unsharp
Mask
Settings = High Res Portrait which is:
Radius: 1.50 Strength: 100 Clipping: 10
Luminance only = Checked
Or use any setting of your choice.
Settings = High Res Portrait which is:
Radius: 1.50 Strength: 100 Clipping: 10
Luminance only = Checked
Or use any setting of your choice.
5. Layers > Duplicate
6. Layers Palette
Hide copy of tube for now.
7. Image > Canvas Size
New Dimensions
Width: 600 Pixels
Height: 250
Placement = Middle box
6. Layers Palette
Hide copy of tube for now.
7. Image > Canvas Size
New Dimensions
Width: 600 Pixels
Height: 250
Placement = Middle box
8. Dropper Tool
Choose a dark (left click on image) and a light color
(right click on image).
Choose a dark (left click on image) and a light color
(right click on image).
9. Layers > New Raster
Layer
10. Layers > Arrange > Send to
Bottom
11. Flood Fill Tool
Flood Fill with your light color.
Flood Fill with your light color.
12. Layers Palette
Highlight your original tube (middle layer)
Highlight your original tube (middle layer)
13. Effects > Image Effects >
Seamless Tiling
Default, but change Direction to Horizontal
Default, but change Direction to Horizontal
14. Effects > Image Effects >
Seamless Tiling
Change Direction to Vertical.
Change Direction to Vertical.
15. Layers >
Duplicate
16. Move Tool
Move your tiled image to between your other tiled image areas where the bg color is showing.
You can hold your Shift key down as you tap your left direction key to do it quicker.
Move your tiled image to between your other tiled image areas where the bg color is showing.
You can hold your Shift key down as you tap your left direction key to do it quicker.
17. Layers > Merge > Merge
Down
18. Repeat steps 15 - 16
Feel free to flip horizontal...vertical as well, until you get most all of your background color covered with your tube.
19. Layers > Merge > Merge Visible
20. Effects > Distortion Effects > Pixelate
Block width and height = 8
Symmetric = Checked
Feel free to flip horizontal...vertical as well, until you get most all of your background color covered with your tube.
19. Layers > Merge > Merge Visible
20. Effects > Distortion Effects > Pixelate
Block width and height = 8
Symmetric = Checked
21. Adjust > Add/Remove Noise > Add
Noise
Gaussian = Chosen
Noise: 20
Monochrome = Checked
Gaussian = Chosen
Noise: 20
Monochrome = Checked
22. Layers Palette
Turn on view of your tube again.
23. Layers Palette
Turn on view of your tube again.
23. Layers Palette
Highlight bottom layer
24. Layers > New Raster Layer
Name :Faux Rag Paper
Name :Faux Rag Paper
25. Flood Fill Tool
Fill with your light color.
Fill with your light color.
26. Effects > Texture Effects >
Texture
Default
Change texture choice to fauxragpaper.
27. Layers > New Raster Layer
Default
Change texture choice to fauxragpaper.
27. Layers > New Raster Layer
28. Selections > Select
All
29. Selections > Modify >
Contract
Put in a number that will bring the marching ants close to your image.
I'm using 8.
Put in a number that will bring the marching ants close to your image.
I'm using 8.
30. Selections > Modify > Select
Selection Borders
Outside = Chosen
Anti-alias = Checked
Border width: 3
Outside = Chosen
Anti-alias = Checked
Border width: 3
31. Flood Fill
Fill selection with your dark color
Fill selection with your dark color
32. Layers > New Raster
Layer
33. Selections > Select
All
34. Selections > Modify > Select
Selection borders
Change to Inside and 2
Change to Inside and 2
35. Flood Fill selection with your dark
color
36. Selections > Select None
Note: If for some reason your borders are too close to each other, you can close off the layer for which ever one you would prefer to.
Note: If for some reason your borders are too close to each other, you can close off the layer for which ever one you would prefer to.
On tube:
37. Drop Shadow
Horizontal = 5
Vertical = 10
Opacity = 50
Blur = 5
Color: Black
Or use your own
Horizontal = 5
Vertical = 10
Opacity = 50
Blur = 5
Color: Black
Or use your own
38. Move Tool
Move your image to where you would like it best.
Move your image to where you would like it best.
39. Layers > Arrange > Move
Down
40. Edit > Repeat (unless you deleted a
frame)
41. Selections Tool
Selection Type: Rectangle
Mode: Add (Shift)
Feather = 0
Anti-alias = Checked
Draw out a selection from your inner frame and downward, covering your excess shadow.
See example:
Selection Type: Rectangle
Mode: Add (Shift)
Feather = 0
Anti-alias = Checked
Draw out a selection from your inner frame and downward, covering your excess shadow.
See example:

42. Edit > Clear
43. Selections > Select
None
Time to choose your faux
rag paper method!
Method 1: Do Step 44. Skip
steps 45 - 51.
Rejoin tutorial at step
52.
Method 2: Do Step 44.
To add your own flare, continue on after using the selection.
To add your own flare, continue on after using the selection.
Method 3: To make this
totally your own paper design, skip Step 44 and continue on with the
tutorial.
44. In layer palette highlight Faux Rag
Paper layer.
Selections > Load/Save Selection > Load Selection From Disk
faux rag paper selection
45. Eraser Tool
Shape = Round
Size: 6
Hardness:100
Step: 10
Density and Thickness: 100
Rotation: 0
Opacity: 50
Click in several areas on your layer to have
the layer beneath show through. You want a
variety of distances between clicks.
46. Eraser Tool
Shape = Square
Size: 2
Now draw out short lines in varying directions across and
around your image.
Shape = Square
Size: 2
Now draw out short lines in varying directions across and
around your image.
47. Eraser Tool
Size: 5
Click in several areas.
Size: 5
Click in several areas.
48. Eraser Tool
Size: 1
Draw scratches in your "paper".
Size: 1
Draw scratches in your "paper".
49. Eraser Tool
Choose your own shape and size
and continue to make marks in your paper if you'd like.
Choose your own shape and size
and continue to make marks in your paper if you'd like.
50. Magic Wand
Mode: Add (Shift)
Match mode: Opacity
Tolerance: 0
Feather : 0
Nothing checked
Left click on your light colored layer.
Mode: Add (Shift)
Match mode: Opacity
Tolerance: 0
Feather : 0
Nothing checked
Left click on your light colored layer.
51. Selections >
Invert
52. Edit > Clear
53. Selections > Select None
If you would like, you can flip both horizontal and vertical and see if you like that look better. Edit > Undo twice if you tried and you liked it better before.
If you would like, you can flip both horizontal and vertical and see if you like that look better. Edit > Undo twice if you tried and you liked it better before.
54. In Layer Palette
Lower opacity if you'd like 90-95.
You can do the same to the layer below.
55. Optional: Layer Palette
Highlight lowest layer.
Gamma Correction (Shift + G)
I used .8 to brighten the colors for some of my results.
56. Selections > Select All
57. Selections > Clip to Canvas
58. Selections > Select None
59. Edit > Copy
60. Edit > Paste As New Image
We will use this for our text pattern next.
We will use this for our text pattern next.
61. Materials background
Change to pattern
Pattern = The copy we just made
Angle: 45
Scale: 60
(or whatever settings look best for yours)
If you find you don't like how this looks, change back to solid, and choose a medium color for your background.
Change to pattern
Pattern = The copy we just made
Angle: 45
Scale: 60
(or whatever settings look best for yours)
If you find you don't like how this looks, change back to solid, and choose a medium color for your background.
62. Palette Layers
Highlight your top layer.
Highlight your top layer.
63. Text Tool
I used Klarinda Playful from dafont.com
Size 9
Units: Points
Bold
Align Center
First Direction
Sharp
Stroke Width 1.5
I used Klarinda Playful from dafont.com
Size 9
Units: Points
Bold
Align Center
First Direction
Sharp
Stroke Width 1.5
64. Effects > 3D Effects > Inner
Bevel
Click on the Default Arrow and then change:
Bevel: 2
Depth: 2
Click on the Default Arrow and then change:
Bevel: 2
Depth: 2
65. Optional: Gamma Correction (Shift +
G)
I used .8 to brighten the colors.
I used .8 to brighten the colors.
66. Effects > 3D Effects > Drop
Shadow
Change Vertical to 2 and Horizontal to 5.
Change Vertical to 2 and Horizontal to 5.
67. Objects > Align > Vertical
Center
Or place where you best like your text.
Or place where you best like your text.
68. Add your copyright information on a new
layer.
69. File > Save As
I like to save as png for the clearest image.
You can save as jpg if you'd like less kbs.
I like to save as png for the clearest image.
You can save as jpg if you'd like less kbs.
A huge thank you to Barbara and Cathy for testing this!
-------------------------------------------------------------
You
are done! I hope you enjoyed it!
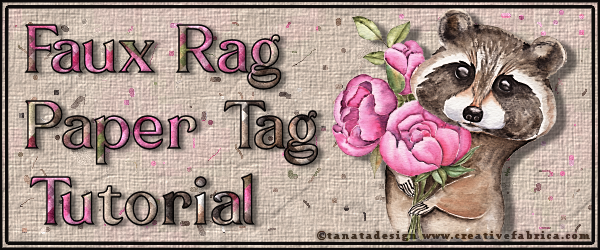
Faux Rag Paper Tag Tutorial
Made by Meshi October 22, 2021

Comments
Post a Comment